Marvin Pro Startup and Debugging
This page applies to the current Tianzhun-controller version and covers the minimum sequence from power-on to first teleoperation. For buttons, recording, playback, and logs, see Current Marvin Pro Apex Teleop.
1. Before startup
- Connect the robot, cabinet, host PC, and headset according to Hardware Wiring.
- Release the emergency stop and clear the robot workspace.
- Put the host PC and Tianzhun controller on the same subnet.
- Connect the headset to the same LAN.
- Check whether the robot is still in its factory packing pose. Do not click Home from the packing pose. A wrist camera may collide with the center column.
2. Connect to the Controller
Select the address and account for the controller installed in the device. These are factory defaults; use the delivery configuration if the IP address, username, or password has been changed.
| Controller | Default IP | Username | Default password |
|---|---|---|---|
| Tianzhun | 6.6.7.100 | nvidia | nvidia |
| Lingjing Thor | 6.6.7.100 | user | 1 |
Tianzhun controller:
ping 6.6.7.100
ssh nvidia@6.6.7.100
Lingjing Thor controller:
ping 6.6.7.100
ssh user@6.6.7.100
Enter the corresponding default password on the first SSH connection. If the delivered device already uses a changed password, do not attempt to restore the factory default.
After controller power-on, if the delivered system contains ~/cam_geac, initialize the cameras according to the delivered configuration:
cd ~/cam_geac
./rb_camera.sh init
Start the Apex backend service:
sudo systemctl start apex-backend.service
sudo systemctl status apex-backend.service --no-pager
Disable
X11-Forwardingin MobaXterm to avoid camera timeout or headset video issues.
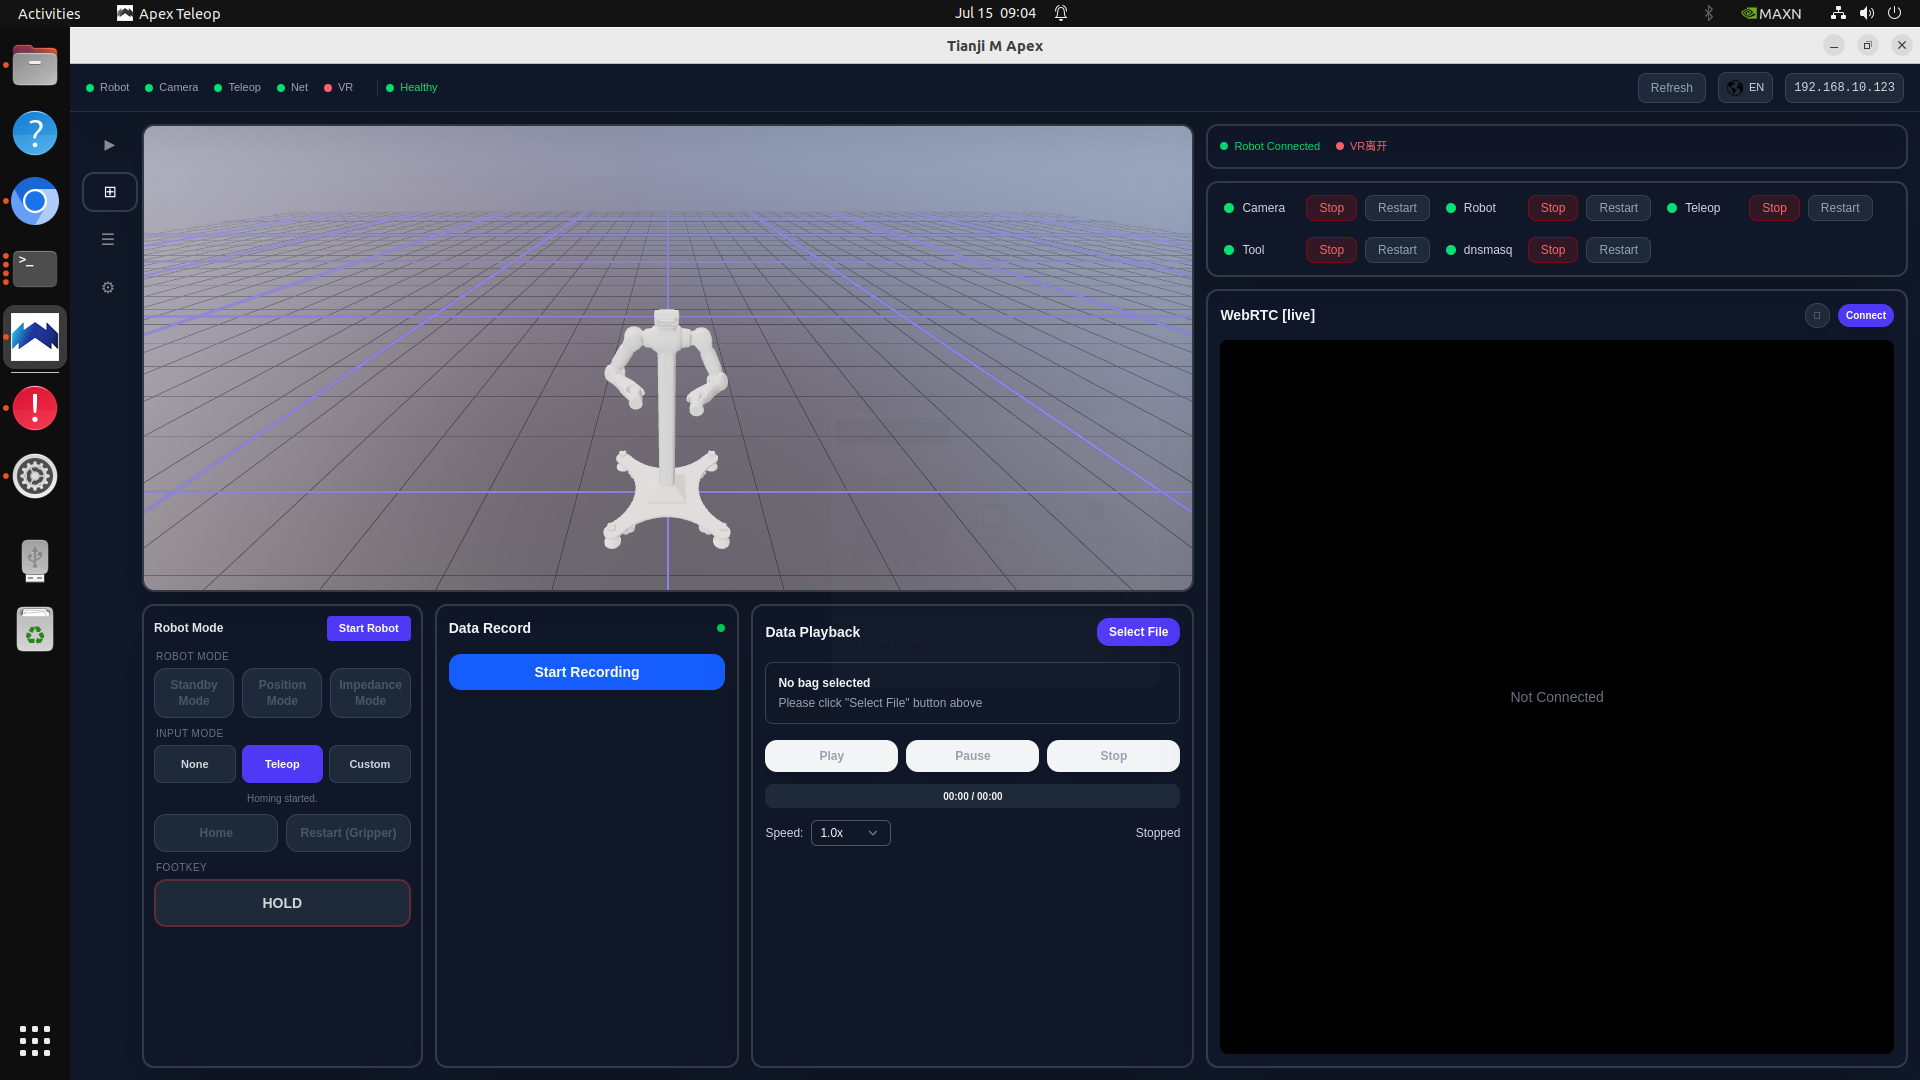
3. Start Apex Teleop and the Robot
- Open Apex Teleop.
- Enter the Tianzhun controller IP in the upper-right field and press Enter.
- Start Robot.
- Confirm that the URDF pose matches the physical robot.
- Start Teleop and dnsmasq.
- Start Camera when video is required. Start Tool only when an end effector is configured.
- Click Start Robot in the lower-left card.
4. First Unpacking: Exit the Packing Pose
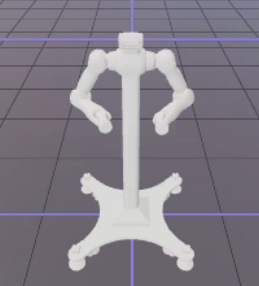
The robot is delivered with both arms hanging vertically close to the center column. Calling Home directly from this pose can cause a wrist camera to collide with the column. After first unpacking, or whenever the robot has been manually returned to the packing pose, enable drag mode and manually move both arms to the standard zero pose shown below.
- Confirm that the Robot module is green and that Start Robot has been clicked. Drag mode can only be enabled after the robot reaches Ready state.
- Open a terminal and enable drag mode:
source /etc/apex/apex_ros_env.sh
ros2 service call /tj/control/set_drag \
  marvin_msgs/srv/Int "{data: 1}"
The command must return success: true. If the service is unavailable or the call fails, do not move the arms. Check the Robot module, robot connection, and Ready state first.
- Slowly drag both arms away from the center column and adjust them to the standard zero pose shown above. Maintain safe clearance between the wrist cameras, arms, and center column throughout the movement.
- As soon as the adjustment is complete, disable drag mode:
ros2 service call /tj/control/set_drag \
  marvin_msgs/srv/Int "{data: 0}"
Continue only after the command returns success: true. Keep the emergency stop within reach throughout the operation. This section does not need to be repeated when the robot has already left the packing pose and its Home path is known to be safe.
5. Enter the Teleoperation Pose
- Confirm that the robot has left the packing pose, both arms are in the standard zero pose, and drag mode is disabled.
- Select Impedance Mode.
- Click Home and wait until the frontend reports completion and the robot is stable at the teleoperation initial pose. When Home is called through the ROS service, a successful response only means that the trajectory started; continue only after
/tj/info/go_home_statusreportssucceeded. - Set Input Mode to Teleop.
6. Connect the Headset
Marvin Pro supports Pico and Meta Quest:
Connect the headset cable, open the Apex headset client, and connect to the controller. Confirm the VR state in Apex Teleop, then begin with small motions in a clear workspace.
7. Quick Checks
| Symptom | Check |
|---|---|
| Cannot connect from the IP field | IP, subnet, cable, and controller network |
| Robot does not start | E-stop, robot power, controller link, and Robot log |
| URDF does not follow the robot | Robot module and robot model configuration |
| Teleop unavailable | Robot running and Ready state |
| Headset cannot connect | dnsmasq, headset cable, connection IP, and VR state |
| Camera is black | Camera module, camera initialization, and camera_sources |
| No teleoperation motion | Impedance Mode, Home completion, and Teleop input mode |
| First startup from the packing pose | Do not Home directly; after Robot is Ready, enable drag mode, manually move both arms to the standard zero pose, and disable drag mode |
| Drag mode cannot be enabled | Check that Robot is running, Start Robot has completed, and /tj/control/set_drag returns success |
| Home path approaches the center column | Stop immediately and use the emergency stop if needed; verify that the robot has left the packing pose, drag mode is disabled, and the starting pose is safe |
For further diagnosis, see Apex Teleop logs.